Showing posts with label dessert. Show all posts

Friday, May 7, 2010

A Different Kind of Cobbler!

With summer fast approaching I know I will be making my berry cobbler verrrry soon! But I do want to share this recipe I made for the 1st tiem voer the winter adn have made a few times since. I'm sure I sound like a broken record, but it is so good, EASY, and easy to keep the ingredients on hand- definitely qualifying it as a keeper in my book! It is originally from our local paper. Before I made it I though, "Chocolate cobbler, hmmmm, what is chocolate cobbler going to taste like?" And after sinking into a bite it was like "Oh, of course, chocolate cobbler!" YUM.

Chocolate Cobbler

Base:
2 sticks butter
1 1/4 c. sugar
1 1/2 c. self rising flour
1 tsp. vanilla
3/4 c. milk

Chocolate Layer:
1 c. sugar
6 Tbs. cocoa
2 c. boiling water

Preheat oven to 350. Place butter in a glass 9x13 and melt it in the oven while it preheats.
In a bowl combine rest of "base" ingredients to make batter. Pour over melted butter in pan and DO NOT MIX.
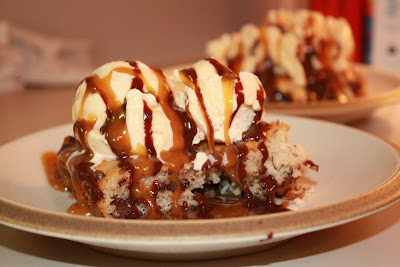
In a second bowl, mix sugar and cocoa, and meanwhile be boiling 2 cups water. Sprinkly cocoa mixture over butter and batter, again NOT mixing. Pour boiling water over the top and again DON'T STIR. Stcik it in the oven and bake 30- 45 minutes. Be careful not to over cook.

Don't know why I took the pic before adding the vanilla ice cream!?! What was I thinking?

I know, I know allll that sugar and butter- so bad, but oh so good!

Wednesday, January 6, 2010

CopyCats (Part Two)

So this seems so typical of how Ryan and I work. We used to go to Chili's all the time when we were dating in highschool. If we ordered dessert we always got the molten chocolate cake. It is good, but I was always deep down secretly longing for my favorite- Chocolate Chip Paradise Pie. But I thought it wouldn't be Ryan's thing, so I always just gladly shared the chocolate cake.

This year, after eight years of being together, we went to Chili's on my birthday and I decided it was time. It was my birthday after all and I was going to get whatever I really wanted, and my sweet husband of course, more than obliged. Well, as it turned out he was in love and liked it I think even more than I do, haha, of course. So you can imagine how excited we were when I saw it in my previously mentioned new cookbook.
I gave it a whirl last night. When baking the cookie part, I wasn't sure- the texture seemed fluffier. But once I topped with that crazy good ice cream, caramal, and fudge, it became that gooey dessert that I so love.

Chili's Chocolate Chip Paradise Pie


Crust:
3 Tbs. butter
1/3 cup graham cracker crumbs
3 Tbs. sugar
1/3 cup chocolate chips

Filling:
1/2 cup all purpose flour
1/4 cup sugar
3/4 tsp. baking powder
1/3 cup milk
1 Tbs. veg. oil
1 tsp. vanilla
1/3 cup chocolate chips
1/4 cup shredded coconut
1/4 cup crushed walnust or almonds (I used crushed sliced almonds b/c I think they are less overwhelming- I don't really like big chunks of nuts in things)

To Serve
vanilla ice cream
hot fudge
caramel syrup

Preheat oven to 350.

For crust, mix melted butter, cookie crumbs, and sugar. Press into a 1 qt. baking dish and top with choc. chips. Bake for about 5 min or until chocolate is melted. Spread the chocolate evenly over crust.

For the filling, mix 1st three dry ingredients. Then add milk, oil, and vanilla, strirring until smooth. Stir in chips, coconut, and nuts. Pour into crust and bake 35 minutes, until toothpick comes out clean.

Serve warm with toppings and ENJOY!

Monday, June 22, 2009

Oh So Berry Good!

I am sitting here enjoying a bowl of reheated blackberry cobbler that I made last night for Father's Day. I found this recipe last summer and loved it, and I can't believe I am just now making it again. I think I love it so much because it is just so simple- it's like a cobbler your grandma would make. If you like berries, you will love this!!! And by the way, I am well aware I am no Pioneer Woman- in neither my cooking skills, and certainly not in my photography skills, but I did include step by step pictures for this one that are solely for practical purposes =) Hopefully they will help with the instructions, despite their unprettiness- how could they be pretty with my lovely taupe laminate counter tops for a background anyways? (Oh well=)

Blackberry Cobbler
1 cup butter divided (that is 2 sticks, so there is no need to divide)
1 cup sugar
1 cup water
1 1/2 cups self rising flour (if not self rising, use the same amount regular with 1/4 tsp. salt and 2 1/4 tsp. baking powder- but I tell you, I do love the self rising for this recipe!)
1/3 cup milk, room temperature
2 cups fresh or frozen blackberries
1/2 tsp. ground cinnamon
2 Tbs. sugar

In 10 in. oval or round baking dish, melt 1/2 cup (1 stick) butter; set aside.
In saucepan, heat sugar and water until the sugar is dissolved.
Place flour in mixing bowl; cut in remaining butter (second stick- which is good to have softened) until fine crumbs form.
Add milk, stirring with a fork until dough leaves the side of the bowl.

Turn out onto a floured surface and knead three or four times.

Roll out to an 11x9 in. rectangle that is about 1/4 in. thick.

Spread berries over dough and sprinkle with cinnamon. (I like to smash some of my berries up a little during this step.)

Roll up, jelly roll style. (My dough sometimes crack in this step- especially if I use frozen berries that are still a little cold- I don't think it hurts anything. I also do this on wax paper not to stain those beloved taupe Formica counters too badly)

Cut into 1/4 in. thick slices and carefully lay slices in baking dish over butter. (I usually have to smush them in there and still end up with two layers- that is perfectly good.)

Pour sugar syrup around slices. (You will think uh- oh! But trust me it is supposed to look like that- I promise the water will absorb!)

Bake at 350 degrees for 45 minutes. Remove and sprinkle with sugar and bake 15 minutes more and this is what you will pull out....

My favorite way to serve it is hot with a heaping scoop of vanilla ice cream... duh!

Wednesday, June 17, 2009

Sweet Treat

I for some reason woke up yesterday morning wanting to make these, and once I have something in my head I want to do, well, we know that that usually turns out....

(Martha's picture- I thought this one may look more appetizing than mine below =)

This is a Martha Stewart recipe that I used to make over at a family that I used to work for, keeping their kids after school. The mom was quite the cook AND baker!!! I am not a great baker, but she would leave me ideas for things I could make in the afternoons with all the ingredients there, and I always loved it that she did that. Again, I'm not the greatest baker, even though baking is in my blood ( My grandfather was a baker by profession- and an awesome one at that, and my mom actually just did her 1st wedding cake!) Despite the fact that the genes apparently skipped me, I do enjoy it **when I have the extra time** I don't like to bake in a rush. If you've got the time, these cookies are pretty fun to make- and of course even more fun to eat!!

Peanut Butter Surprise Cookies


1/2 cup creamy peanut butter
4 Tbs. unsalted butter, room temp
1 cup packed brown sugar
2 eggs
1 tsp. vanilla

1 1/2 cup flour
1 tsp. baking powder
1/4 tsp. salt

1/3 cup sugar- for rolling dough in
36 mini Reese's cups, unwrapped and chilled ( my batch never makes 36 cookies worth, so you may not want to unwrap that many to start with)

Heat oven to 350.

Mix Peanut butter and butter until smooth. Add in brown sugar and beat well, scraping down sides as needed. Beat in eggs and vanilla until well blended.

Whisk together flour, baking powder, and salt to mix. Beat into the peanut butter mixture in two batches until well mixed.

Roll dough into balls by Tablespoon and roll to coat in the sugar.
Place on insulated baking sheet and bake for 7 minutes or until starting to slightly puff up. Remove and press a peanut butter cup into the center of each cookie. Return to oven and bake an additional 6 minutes, or until golden. Let cool on baking sheet for at least 10 minutes before transferring.

Monday, April 6, 2009

White Chocolate Raspberry Cheesecake

I made this cheese cake for our Grace Group this weekend and was very pleased and I think most everyone else seemed to be too! I got the recipe from AllRecipes.com (If you don't use this cooking website, you should!) There are a couple things I want to do a little different next time I make it- maybe I will try it again for Easter- it is an all around WINNER and came out beautifully, other than I want my crust a little thicker next time!


White Chocolate Raspberry Cheesecake
.
Crust:
.
1 cup chocolate wafer cookies crushed (I used Oreos and will use 2 cups next time)
3 Tbs. Sugar
1/4 cup butter, melted
Mix and press into the bottom of spring form pan.
.
Raspberry Sauce:
.
1 10 oz. bag frozen raspberries
2 Tbs. sugar
2 tsp. cornstarch
1/2 cup water
.
Combine in saucepan and bring to boil. Boil five minutes until thickened. Strain to remove seeds.
**This was the trickiest part. Getting the seeds out is a little rough. I ended up adding some water to get it to run through the strainer better. I then felt like it was too runny, so I added more sugar and cornstarch and reboiled until thick again. This worked well- it had a little less of the raspberry tang, but I was okay with that. I don't know if I will try another technique next time?
.
White Chocolate Sauce:
.
2 cups (12 oz. bag) white chocolate chips
1/2 cup half and half
.
Melt together in microwave safe dish. the original recipe says to heat in bowl over pan of simmering water- I didn't bother with all that- the microwave worked just fine, just don't heat for more than 20 seconds at a time to prevent scorching and stir between each heating.
.
Cheesecake Filling:
.
3- 8 oz. packs cream cheese, softened
1/2 cup sugar
3 eggs
1 tsp. vanilla
.
Mix together sugar and cream cheese until smooth. Blend in eggs, one at a time. Add vanilla and white chocolate sauce and blend well.
.
Pour half of the batter over the crust. Spoon 3 Tbs. of the raspberry sauce over. Pour remaining batter on top and follow with another 3 Tbs. raspberry sauce. Swirl with the tip of a sharp knife.
Bake 55-60 minutes at 325 degrees. Cool and chill at least 8 hours. Garnish as desired and serve with remaining raspberry sauce.
.
(I heard a tip to keep the cheesecake from sinking and cracking is to turn off your oven when it is done baking and leave the cheesecake in there- I read once with the door open and once didn't specify) I left the door open to make sure it didn't burn. I think this may have helped?)
.
You won't be disappointed!!!!

Thursday, March 19, 2009

Old Fashioned Red Velvet Cake....

Ingredients:
1/2 c butter
2 whole eggs
2 TBSP (heaping) cocoa
2 1/4 c of cake flour
1/2 tsp salt
1 TBSP white vinegar
1 1/2 c sugar
2 ounces (1/4 c) red food coloring
1 c buttermilk
1 tsp vanilla
1 tsp baking soda

Preparation:
Cream butter and sugar, then add eggs. Make a paste of food coloring and cocoa and add to the creamed mixture. Add alternate buttermilk with flour and salt, then add the vanilla. Add soda to the vinegar. HOLD OVER THE BOWL, AS IT FOAMS! Then add the soda and vinegar to the mixture, blending instead of beating. Bake 25 to 30 mins. at 350 degrees in two 8-inch greased and floured round cake pans. Cool on racks. Using very sharp knife, or dental floss (yes, dental floss!) split each layer into 2 layers. Make sure the center of the cake comes clean on a tooth pick before you remove from oven... I found it needed about 8 minutes longer in my oven.

Frosting for Red Velvet Cake

3 tablespoons flour
1 cup granulated sugar
1 cup butter
1 cup milk
1 tsp vanilla

Blend flour in a little of the cold milk and then add rest of milk and cook, stirring constantly until it forms a ball. Cook flour and milk until very thick. Remove from heat, and cool. Cream sugar, butter and vanilla until very light and fluffy. Add to first mixture. It should have a light texture similar to whipped creme. Frost all four layers and sprinkle with coconut.

I have never seen flour in frosting.... but it is YUMMY!

Monday, March 2, 2009

Yahoo for Scotcheroos!!

**EDIT: I originally forgot the measurement for peanut butter in the ingredients list. It is there now, sorry for the confusion.**

I have been craving these like crazy lately and finally made a pan this weekend! My cravings were not disappointed. This is an easy, yummy dessert that I crave for the chewy texture. So good!

Chocolate Scotcheroos- AKA- Special K Bars

1 cup white sugar
1 cup light corn syrup
1 cup peanut butter
6 cups crispy rice cereal ( some recipes I see say Rice Krispies- I only use Special K Rice Flakes)
1 cup semisweet chocolate chips
1 cup butterscotch chips

Butter a 9x13 pan.
In saucepan over medium heat, combine sugar and corn syrup- bringing to a rolling boil (do not over boil or they will be hard as rocks). remove from heat and stir in peanut butter. Mix in cereal until evenly coated. Press into pan. In glass dish (measuring cup) microwave chips, stopping and stirring every 30-45 seconds to prevent scorching, until smooth and well blended. Spread over top and chill until set. Cut into bars.

**Note- they will be very hard to cut when they have been refrigerated for a while. I like them chilled, but I do set them out a little ahead of time so they aren't quite as hard. Enjoy the chewy chocolaty goodness!


Wednesday, February 18, 2009

Just GOOOD Chocolate Cake

2 Cups Sugar
3/4 cup oil
1 1/2 cup warm water
2 cups flour (not necessary to use cake flour)
2 tsp. soda
1/2 cup cocoa
2 eggs

Mix all ingredients well, pour into lightly oiled and dusted with flour, 9x13 pan, bake @ 350 degrees for 35-40 minutes. Frost with favorite or store bought frosting...

Fast, easy and best with big glass of ice cold milk....